SanerNow Network Scanner homepage has the following options:

The Scanners table displays the following information:
- Name of the Network Scanner
- Scan Configuration assigned to the Network Scanner
- Scan Policy set to the Network Scanner
- Status of the Network Scanner.
The Scanners page lists the designated scanners in the Account. At the same time, the page also provides the list of devices available in the Account that can be designated as Network Scanners.
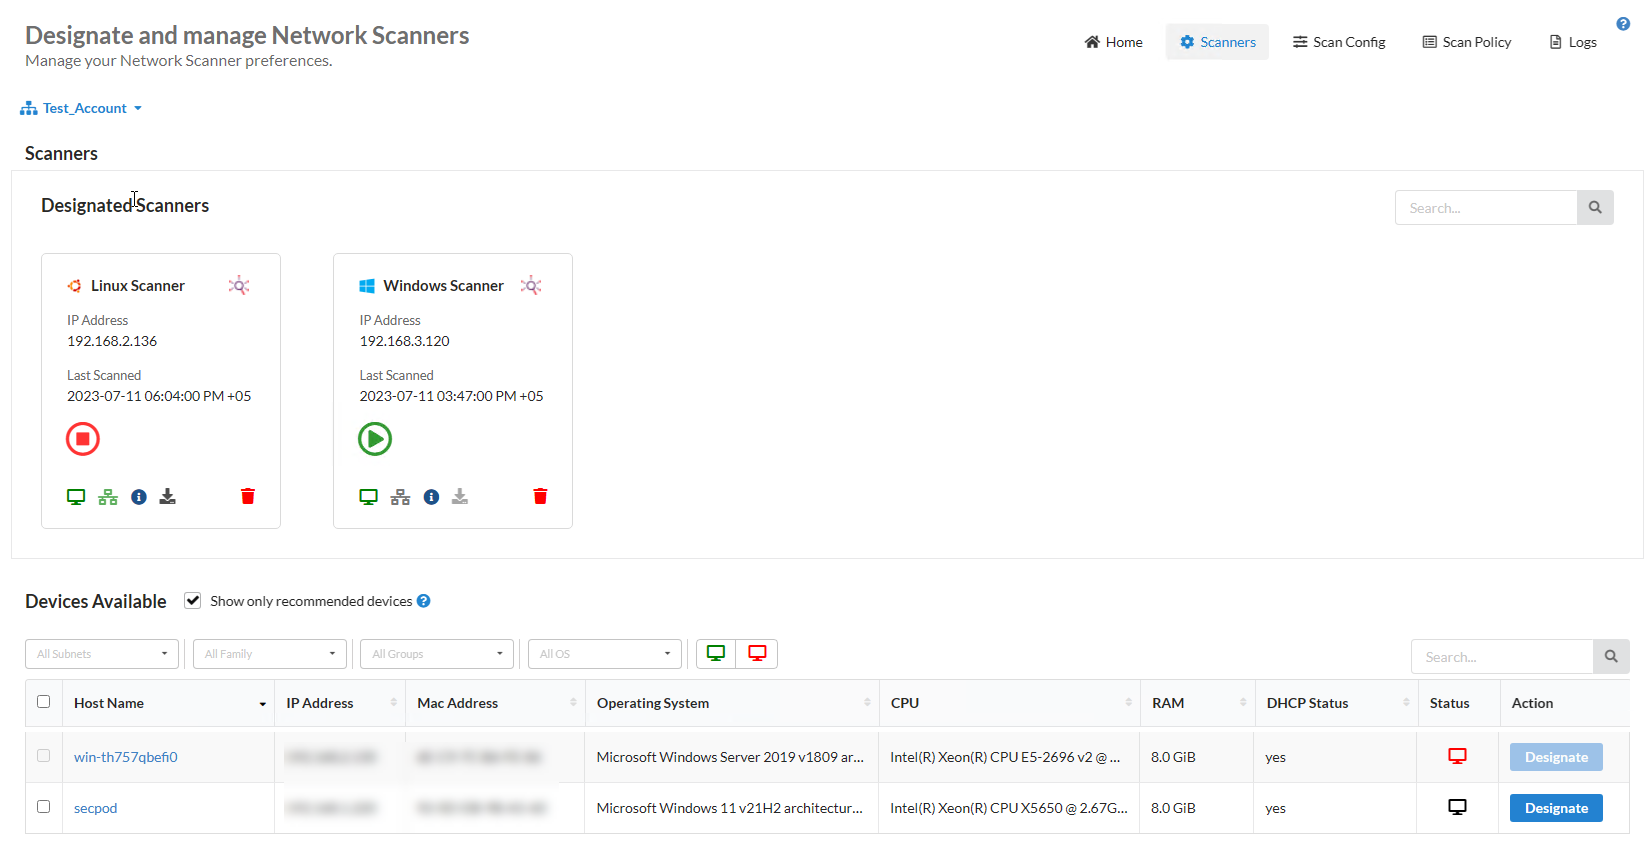
The Designated Network Scanner section has multiple icons. The below table describes the usage of each icon.
| Icons | Description |
|---|---|
| This icon will start the Network Scan when clicked. If this icon is disabled, the device is either shut down or the SanerNow Agent on the device is inactive. | |
| This icon will abort the ongoing Network Scan. | |
| This icon indicates that the SanerNow Agent on the device designated as a network scanner is active. | |
| This icon indicates that the SanerNow Agent on the device designated as a network scanner is inactive. | |
| This icon indicates that the Network Scanner is active and scanning. | |
| This icon indicates that the last Network Scan got aborted. | |
| This icon indicates that the Network Scanner is idle. | |
| This icon provides the details of the last network scan. | |
| This icon indicates that SanerNow Network Scanner is waiting to upload the network scan results to SanerNow Server. | |
| This icon indicates that SanerNow Network Scanner is uploading the network scan results to SanerNow Server. | |
| This icon indicates that SanerNow Network Scanner failed to upload network scan results to SanerNow Server. | |
| This icon deletes the Network Scanner. | |
| This icon downloads the last two network scan reports. However, deleting the designated Network Scanner will delete the reports as well. At the same time, re-designating the Network Scanner will not restore old network scan reports. |
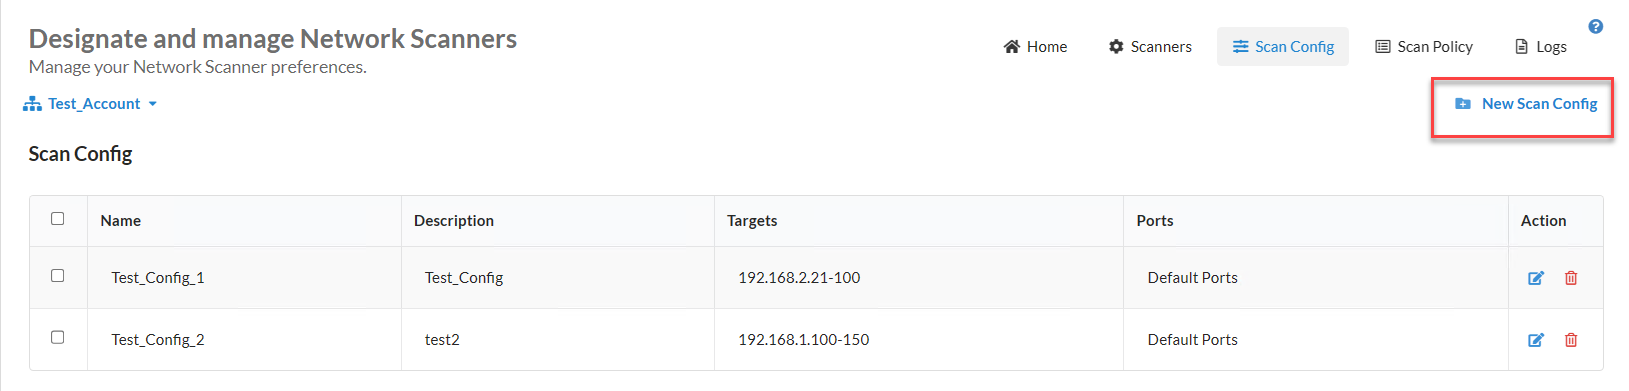
SanerNow Network Scanner uses a scan configuration to identify targets to scan and exclude those not to scan. You can create a new Scan Configuration.
Follow the below steps:
: Click the New Scan Config button at the top right side of the page.
: A new pop-up appears on the screen. Fill in the information in the text boxes marked with an asterisk (*). Let's look at each of these textboxes present on the screen and the type of information you need to provide.
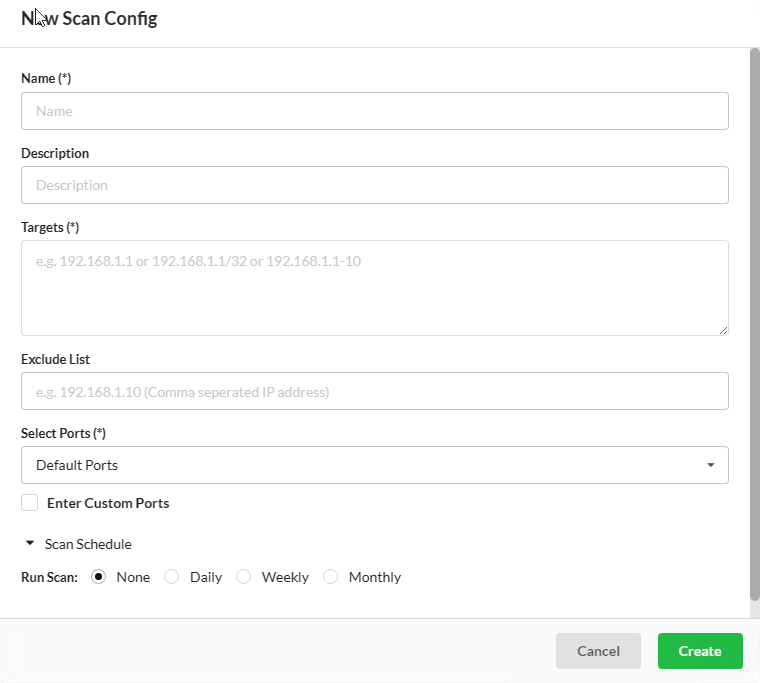
: You must specify a name for the Scan Config.
: Mention the IP addresses of the targets you wish to scan. The IP addresses must be specified in a comma-separated list of target IP addresses or domain names for scanning. Target IP addresses can also be specified using CIDR notation. For example, 192.168.1.1 or 192.168.1.1/32 or 192.168.1.1-10.
: Mention the IP addresses of the targets that need to be excluded by the network scanner while performing a network scan. You can specify multiple IP addresses separated by a comma that needs to be excluded by the Network Scanner.
: This drop-down box provides you with five options. You need to select one of these five options.
- Default Ports
- Top 1000
- Top 500
- Top 100
- None
You can find more information about the ports covered under each category: Default Ports, Top 1000, Top 500, and Top 100 in Port Details under the Other Related Topics section.
However, if you want to specify your own set of custom ports, select the checkbox Enter Custom Ports and enter the TCP and UDP ports you want to be scanned by the Network Scanner.

: Select the Scan Schedule. You can select from the below-mentioned schedules.
- None
- Daily
- Weekly
- Monthly
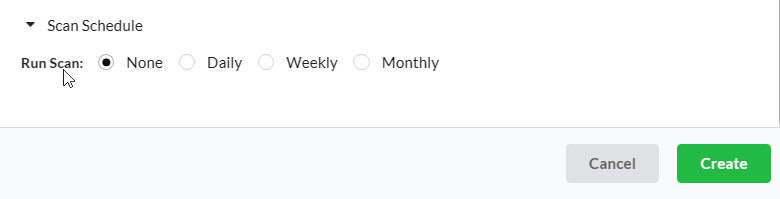
: Click on Create button once you have provided all the information. The Scan Config policy is created and will be listed on the Scan Config page.
You can access Scan Policy by clicking the Scan policy button on the top right of the Network Scanner page.

A Default Policy exists in SanerNow Network Scanner. The Default Policy consists of preselected scripts. You can modify the scripts that are part of the Default Policy. However, you can't delete the Default Policy.
Follow the below steps to create a new policy:
: Click the New Policy button on the top right of the page. A new screen appears, prompting you to select the scripts you want to be part of the New Policy.
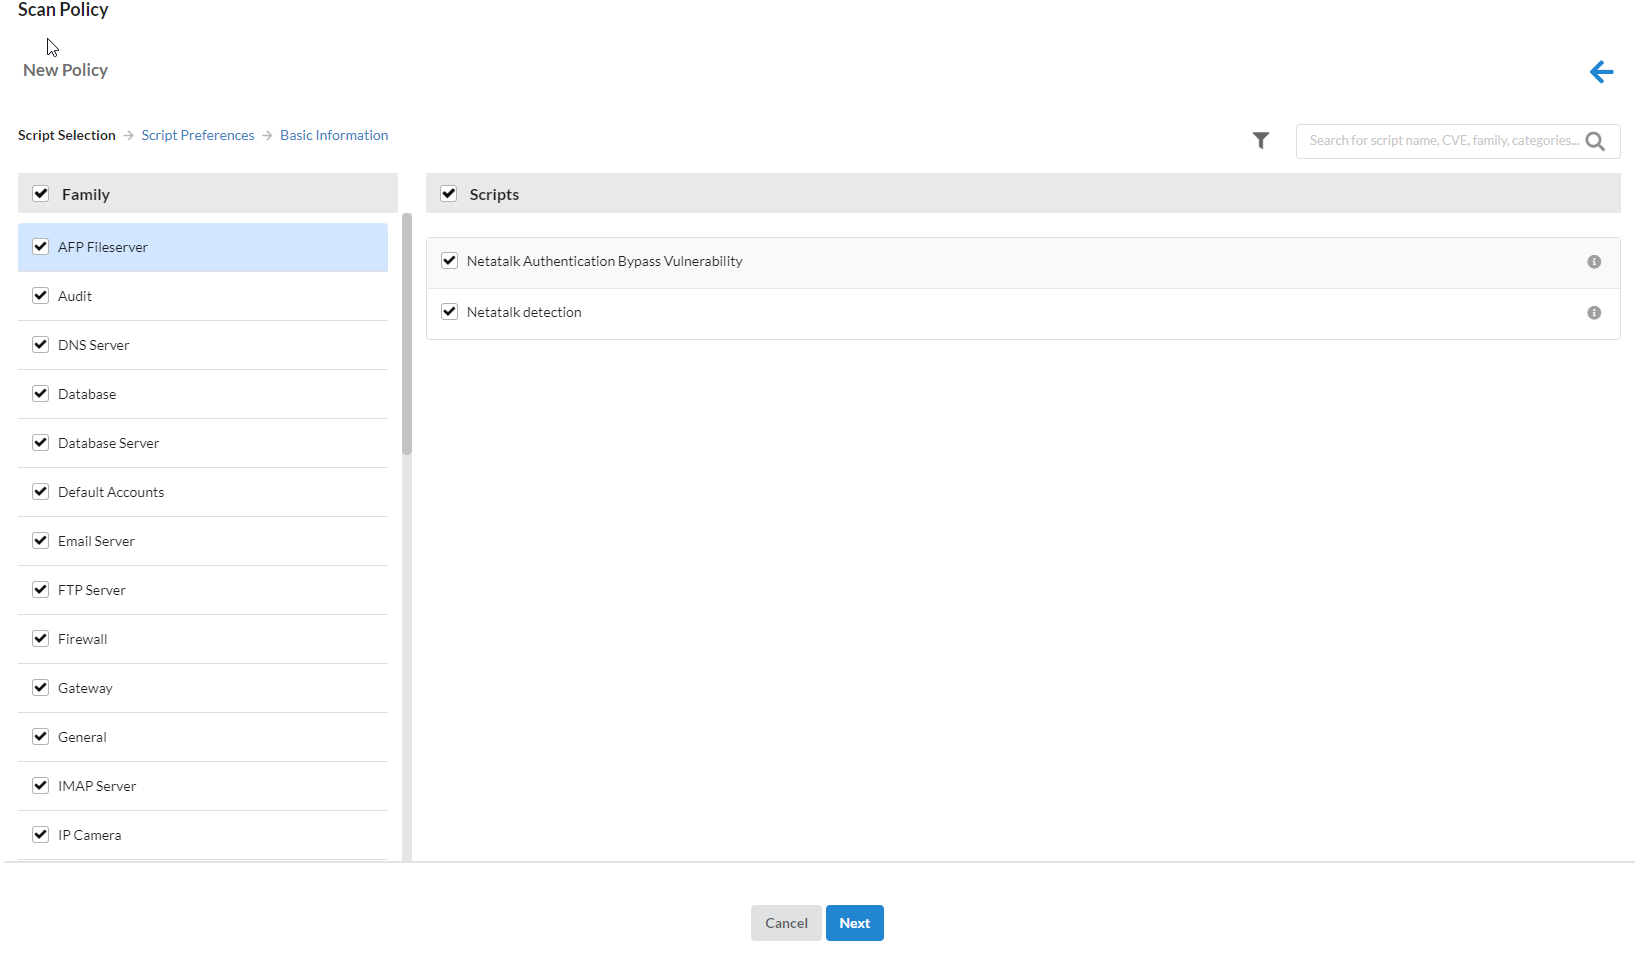
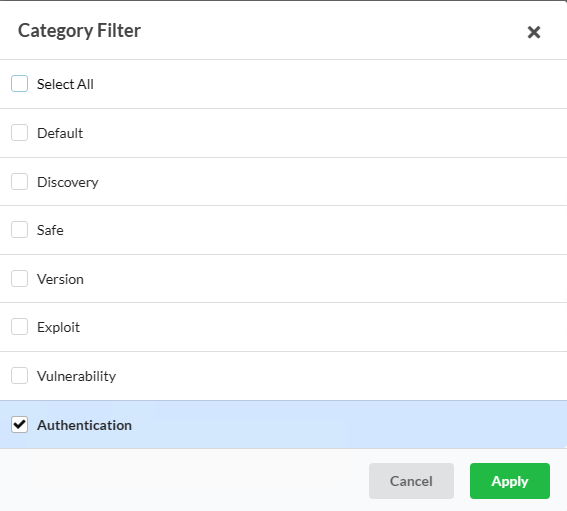
You can filter the scripts by using the category filter. The scripts fall into the following categories:
- Safe
- Vulnerability
- Exploit
- Default
- Discovery
- Version
- Authentication
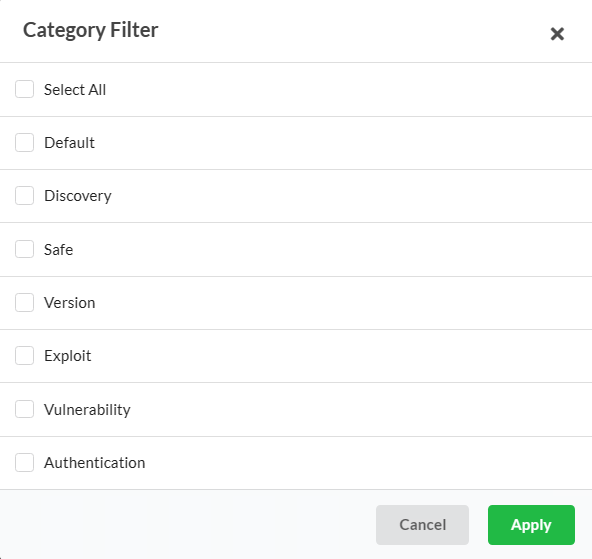
Select the scripts category and click the Apply button. A list of scripts relevant to the selected category will be shown on the page. You can manually deselect scripts you don't want to be part of the Scan Policy. Click the Next button.
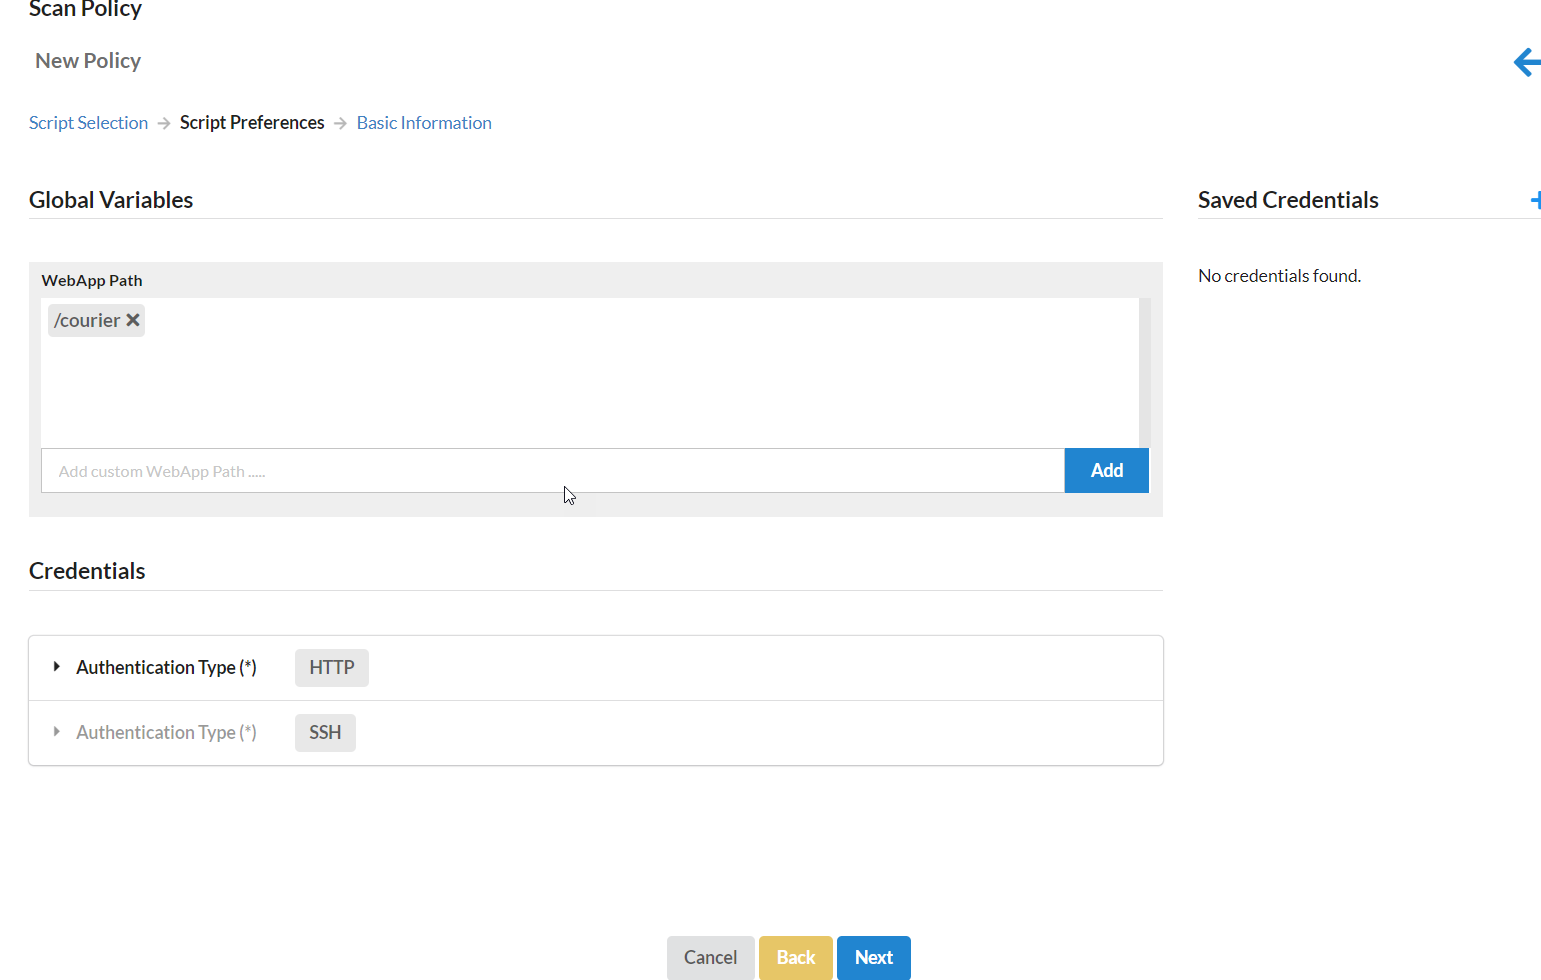
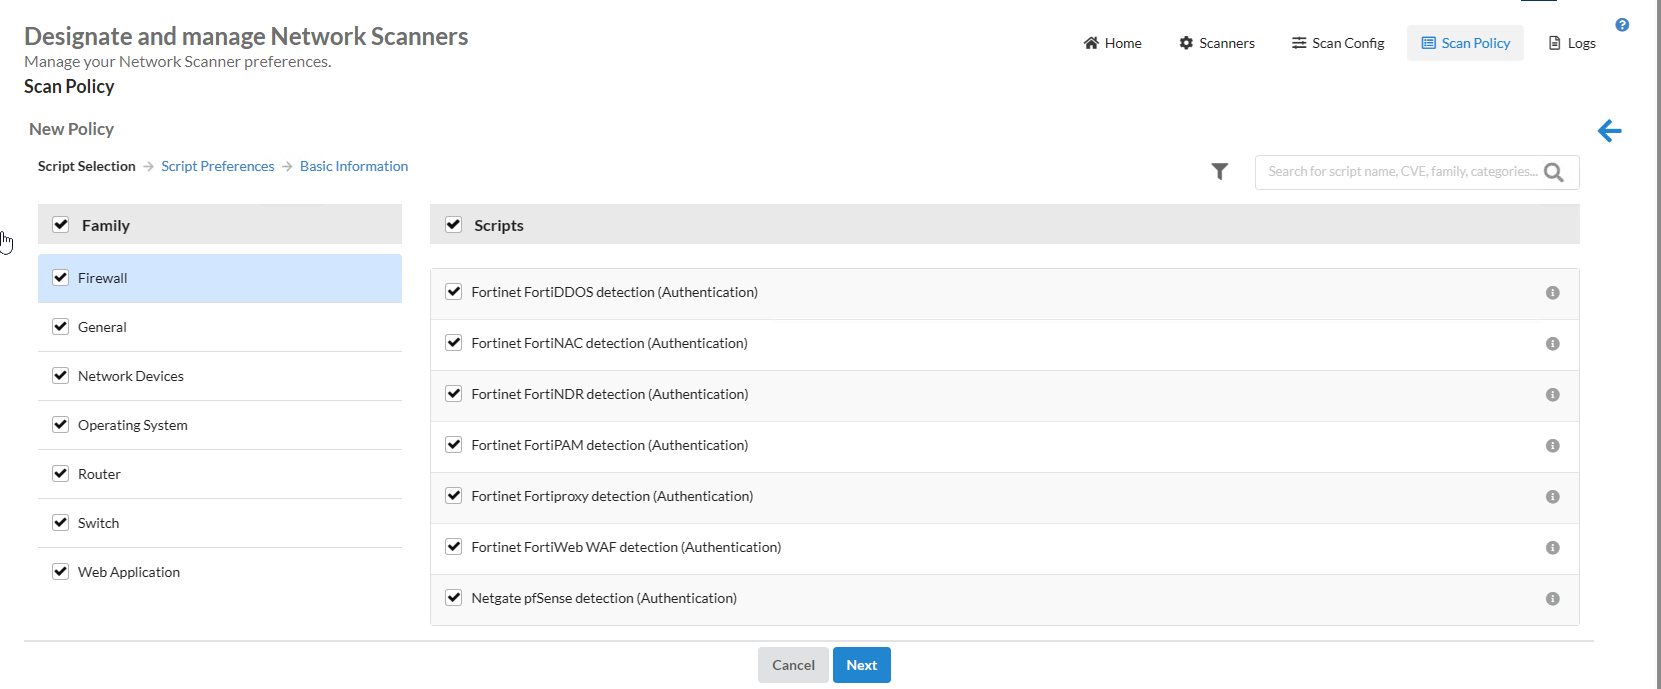
: Provide the path for the web apps hosted in your environment. The Global Variables input fields will allow you to input the absolute path for these web apps. This step is not mandatory and can be skipped if you don't have any web apps in your environment. And then provide the set of credentials for the protocol you want the script to authenticate. HTTP/HTTPS and SSH protocols are currently supported. If you're using HTTP protocol for authentication, you must provide the username and password.
Similarly, while using SSH protocol for authentication, you must provide either the username and password or the private key and passphrase. Specifying credentials is a mandatory step and cannot be skipped. You can save credentials which will appear on the right side under Saved Credentials section.
: Specify the Name of the New Policy. You can also describe the new policy. However, this is optional. Click the Create Policy button to create the new policy.
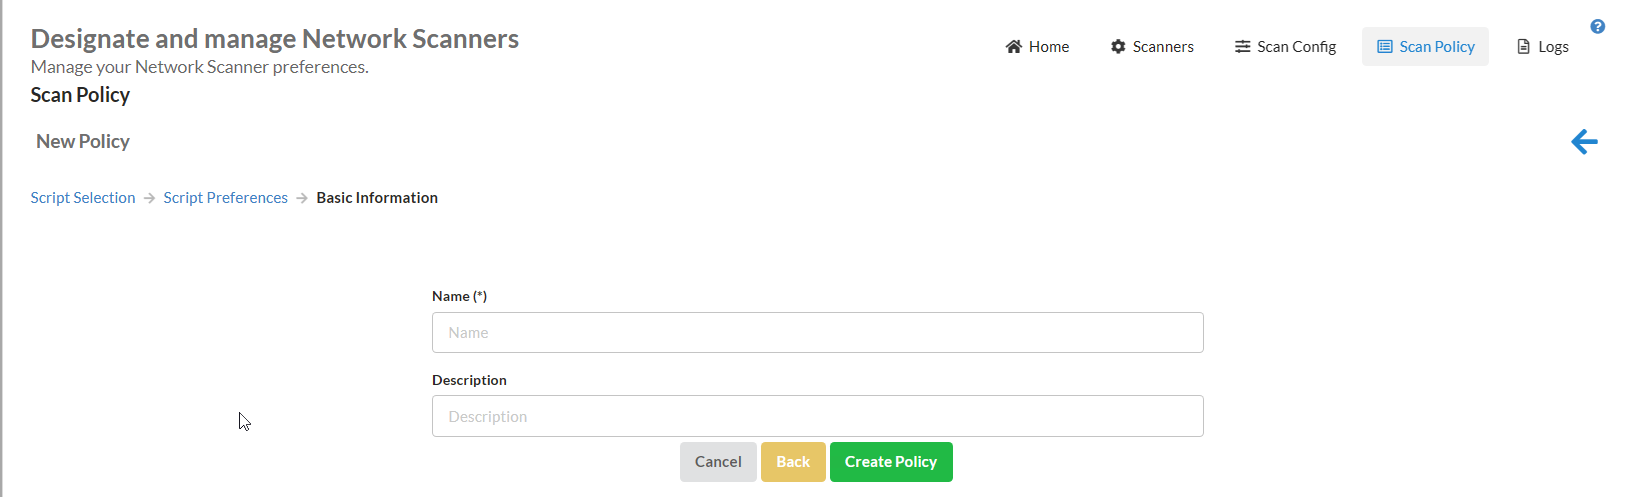
You've successfully created a new Scan Policy!
SanerNow Network Scanner supports authenticated network scanning. New network-scripts under the Authenticated category have been introduced. These scripts allow you to provide credentials and perform an authenticated scan on network devices. Also, SanerNow Network Scanner allows you to store credentials that can be used with scripts supporting authentication.
You can create a new Scan Policy to perform an Authenticated Network Scan. Also, you can edit the existing scan policy, select network scripts supporting authentication, and assign the credentials.
Follow the below steps to create a new policy for performing an Authenticated Network Scan:
: Click the New Policy button on the top right of the page.

: A new screen appears, prompting you to select the scripts you want to be part of the New Policy.

: Click the filter icon and select the Authentication category. And click on the Apply button.
: Network scripts from all the categories that support authentication are displayed on the screen. Click the Next button.
: If the network script supports a web app scan, you will be prompted to provide the path for the web app. SanerNow Network Scanner will scan the web app located at the provided path.

: If the selected network script supports authentication, you can specify the credentials. SanerNow Network Scanner supports the following protocols.
- HTTP/HTTPS
- SSH
For HTTP-type Authentication, you need to provide the following information:
- HTTP Username
- HTTP Password
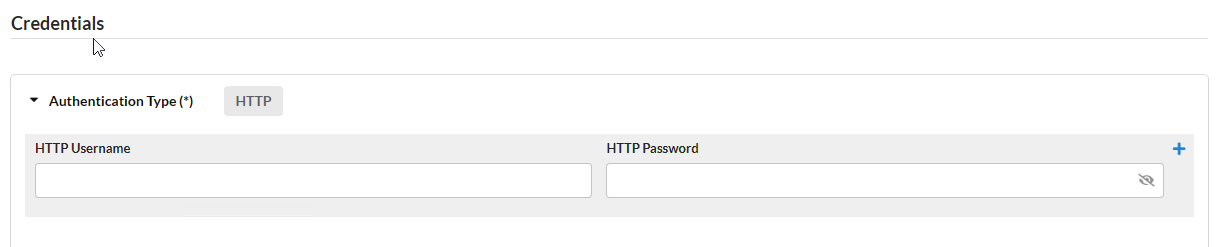
For SSH-type Authentication, you need to provide the following information:
- SSH Username
- SSH Password OR
- SSH Private Key
- SSH Passphrase
The credentials you provide while creating a policy can be used only with relevant network-scripts and can't be re-used. However, you can store credentials permanently in the Network Scanner to be used with network scripts that support authentication.
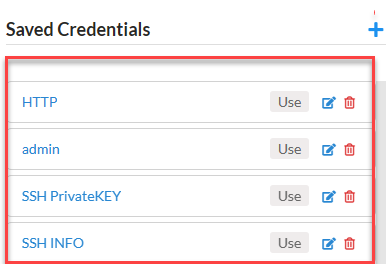
Click the plus icon next to the Saved Credentials label. Previously saved credentials appear below the label.
A pop-up window appears on the screen.
Before saving the credentials, select the authentication type between HTTP and SSH.
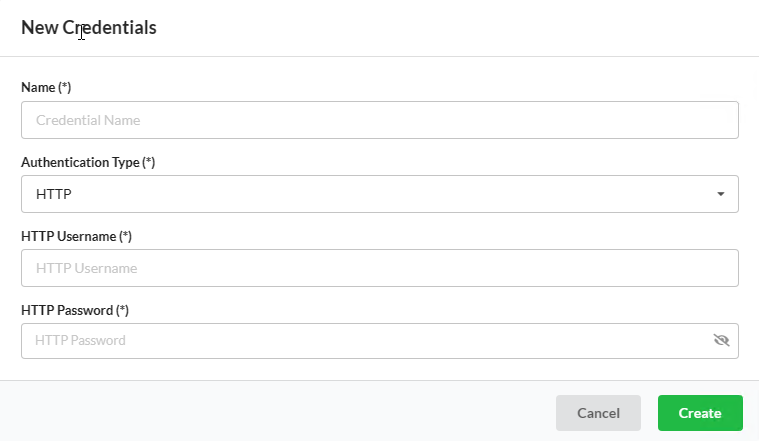
If you select the HTTP authentication type, you must provide the following information.
: Provide the name under which you want the credentials to be saved.
: Select the authentication type as HTTP.
: Provide the username you want the network script to authenticate.
: Provide the password you want the network script to authenticate.
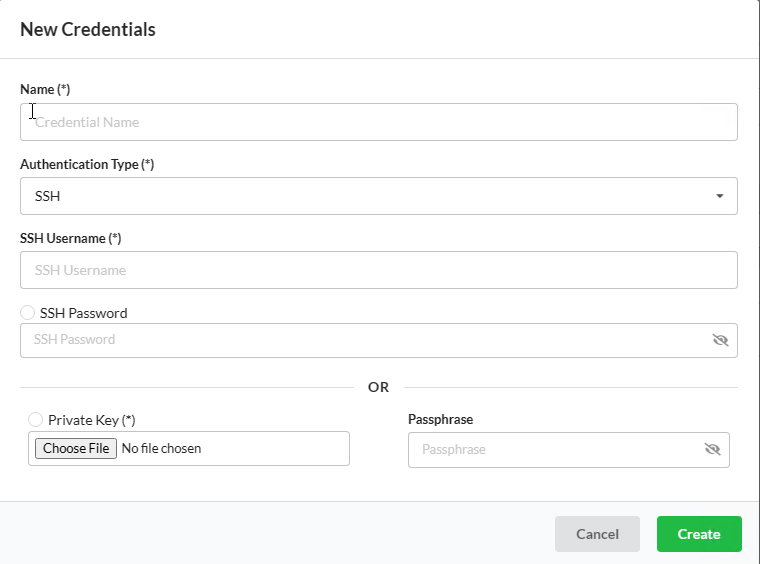
If you select the SSH authentication type, you must provide the following information.
: Provide the name under which you want the credentials to be saved.
: Select the authentication type as SSH.
: Provide the username you want the network script to authenticate.
: Provide the password you want the network script to authenticate.
Alternatively, you can provide the Private Key and Passphrase instead of SSH Password.
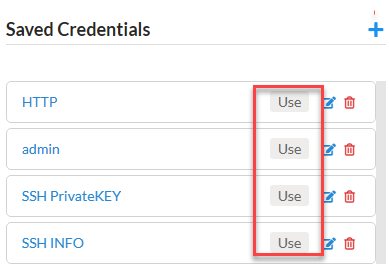
You can use the saved credentials with any network script by clicking the Use button. Similarly, you can click the Edit icon to change existing credentials. And to delete the saved credentials, click the Delete icon .
SanerNow Network Scanner records all the activities performed within the tool. Each action has a unique job code.
To access the Logs section, click the Logs button on the top right of the Network Scanner page.

The table displays the following information:
-
: Job Code The Job Code associated with the action performed within the SanerNow Network Scanner tool.
-
: The date and time when the action was performed within Network Scanner.
-
: The Organization to which the Account belongs is displayed here.
-
: The Account to which the User belongs is displayed here.
-
: The user's name who performed the action in Network Scanner is displayed here.
-
: The action performed using Network Scanner is described here.
You can filter the logs presented in the Log table. The following filters are available:
-
: This filter is used to display Account specific logs. You can specify more than one Account at a time while filtering logs by Account.
-
: This filter is used to display User specific logs. You can specify more than one User at a time while filtering logs by User.
-
: This filter can show logs within a specified date range.
To remove any applied filters, click the Clear All button on the top right of the page. If there are multiple log entries, you can limit the log entries displayed on the screen by selecting the value from the Size drop-down box. You can choose 10, 25, 50, and 100 log entries to be shown simultaneously.
The below-mentioned table lists the job code used in SanerNow Network Scanner and its description.
| Job Code | Events |
|---|---|
| 14000 | Network Scanner Management |
| 14001 | Initiate Discovery Scan |
| 14002 | Add Discovery Scan Configuration |
| 14003 | Update Discovery Scan Configuration |
| 14004 | Delete Discovery Scan Configuration |
| 14005 | Upload Discovery Scan Data |
| 14006 | Failed to Upload Discovery Scan Data |
| 14007 | Add Network Scan Device |
| 14008 | Failed to Add Network Scan Device |
| 14009 | Updated Network Scan Device |
| 14010 | Failed to Update Network Scan Device |
| 14011 | Failed to Add Discovery Scan Configuration |
| 14012 | Failed to Update Discovery Scan Configuration |
| 14013 | Failed to Delete Discovery Scan Configuration |
| 14014 | Stop Network Scan |
| 14015 | Delete Device |
| 14016 | Failed to Delete Device |
| 14017 | Rename Network Scan Device |
| 14018 | Failed to Rename Network Scan Device |
| 14019 | Updated Device As Network Scanner |
| 14020 | Failed to Update Device As Network Scanner |
| 14021 | Removed Device As Network Scanner |
| 14022 | Failed to Remove Device As Network Scanner |
| 14023 | Initiate Network Scan |
| 14024 | Add Network Scan Configuration |
| 14025 | Failed to Add Network Scan Configuration |
| 14026 | Update Network Scan Configuration |
| 14027 | Failed to Update Network Scan Configuration |
| 14028 | Delete Network Scan Configuration |
| 14029 | Failed to Delete Network Scan Configuration |
| 14030 | Add Network Scan Policy |
| 14031 | Failed to Add Network Scan Policy |
| 14032 | Update Network Scan Policy |
| 14033 | Failed to Update Network Scan Policy |
| 14034 | Delete Network Scan Policy |
| 14035 | Failed to Delete Network Scan Policy |
| 14042 | Stop Discovery Scan |
| 14043 | Imported Network Scan Policy |
| 14044 | Failed to Import Network Scan Policy |
| 14045 | Assign Scan Configuration |
| 14046 | Failed to Assign Scan Configuration |
| 14047 | Discovery Scan Failed |
| 14048 | Network Scan Failed |
| 14049 | Unassign Scan Configuration |
| 14050 | Failed to Unassign Scan Configuration |