Click on the following links to get specific instructions for installing Saner Agent.
- Saner Agent Installation using Graphical Installer
- Saner Agent Installation using command line
- Saner Agent Uninstallation using command line
- How to install Saner Agent without activation
- How to check Saner Agent status on your machine
- How to disable Saner Agent from launching a scan post installation
Click on the following links to get OS specific instructions for installing Saner Agent.
Installing Saner Agent on Windows Systems using Graphical Installer.
Step 1: Log in to the Saner CVEM web console. Click the gear icon  located on the top right to access the Control Panel.
Step 2: Select the Organization you want to work with and then Click the Agent Deployment tab.
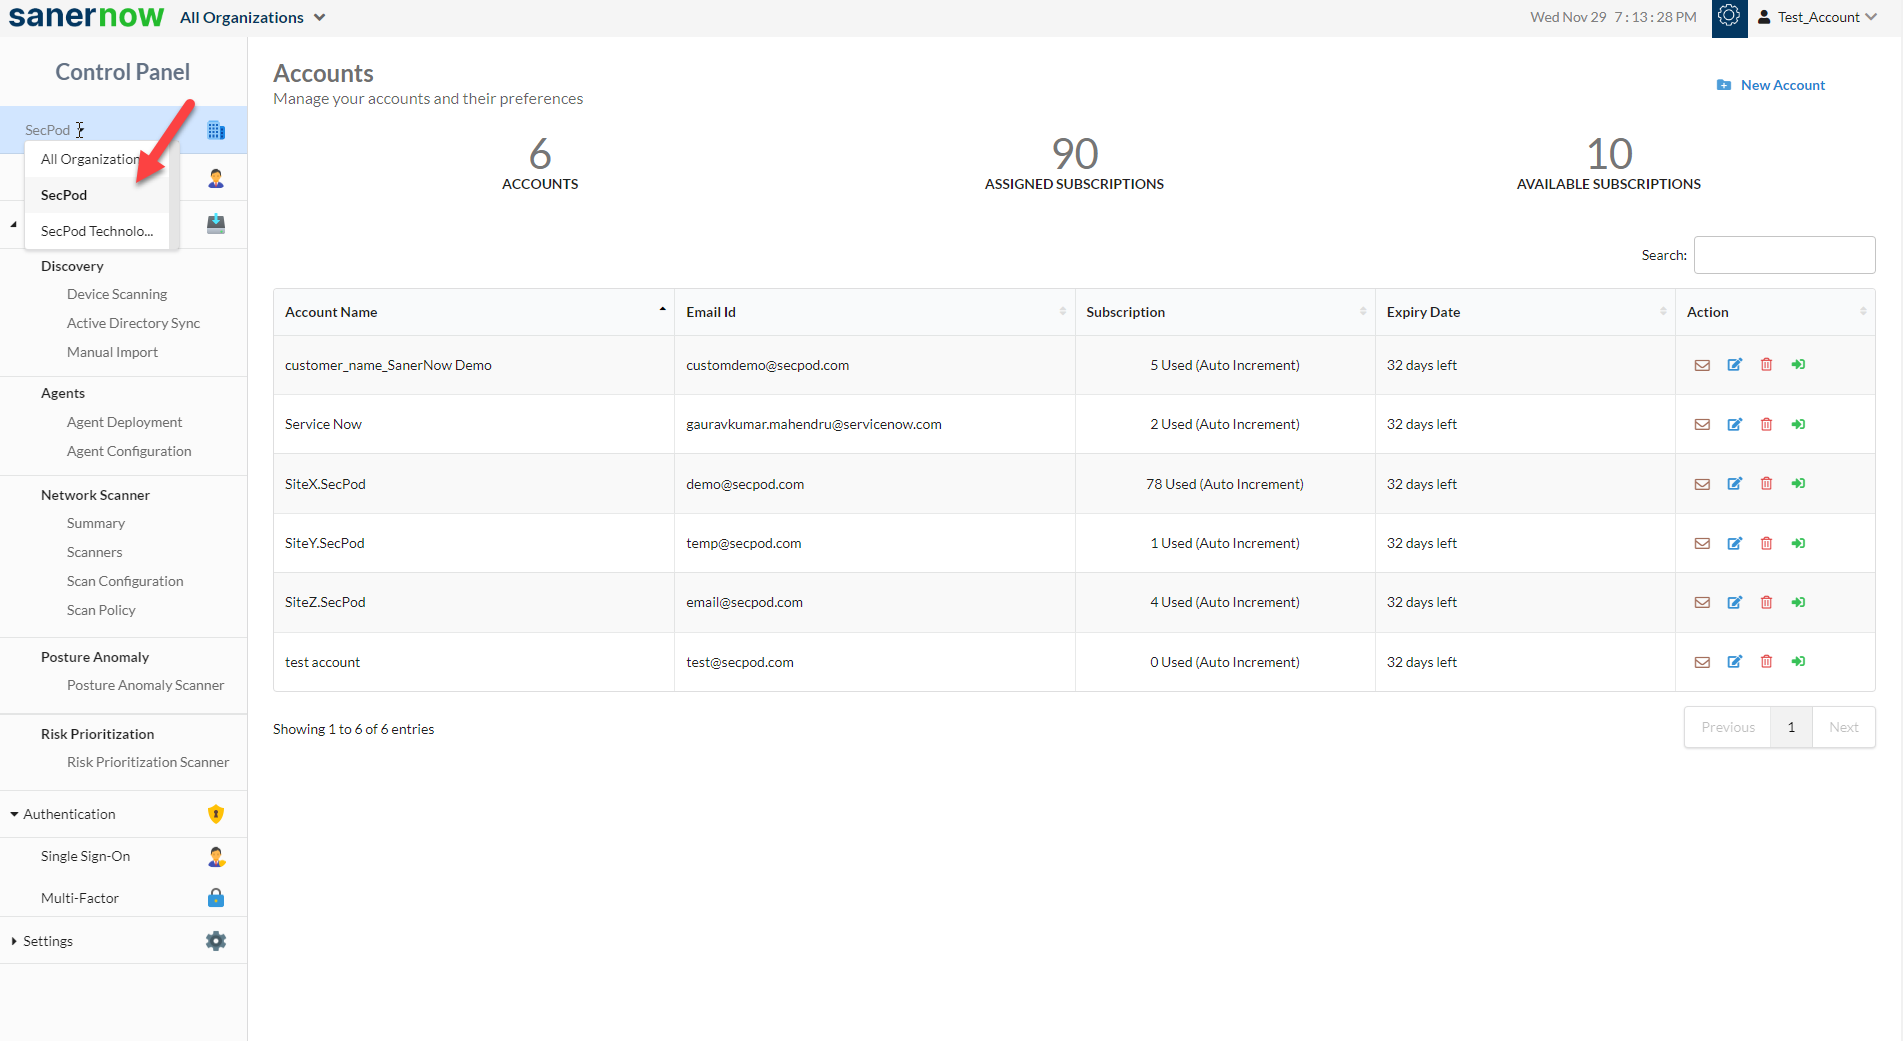
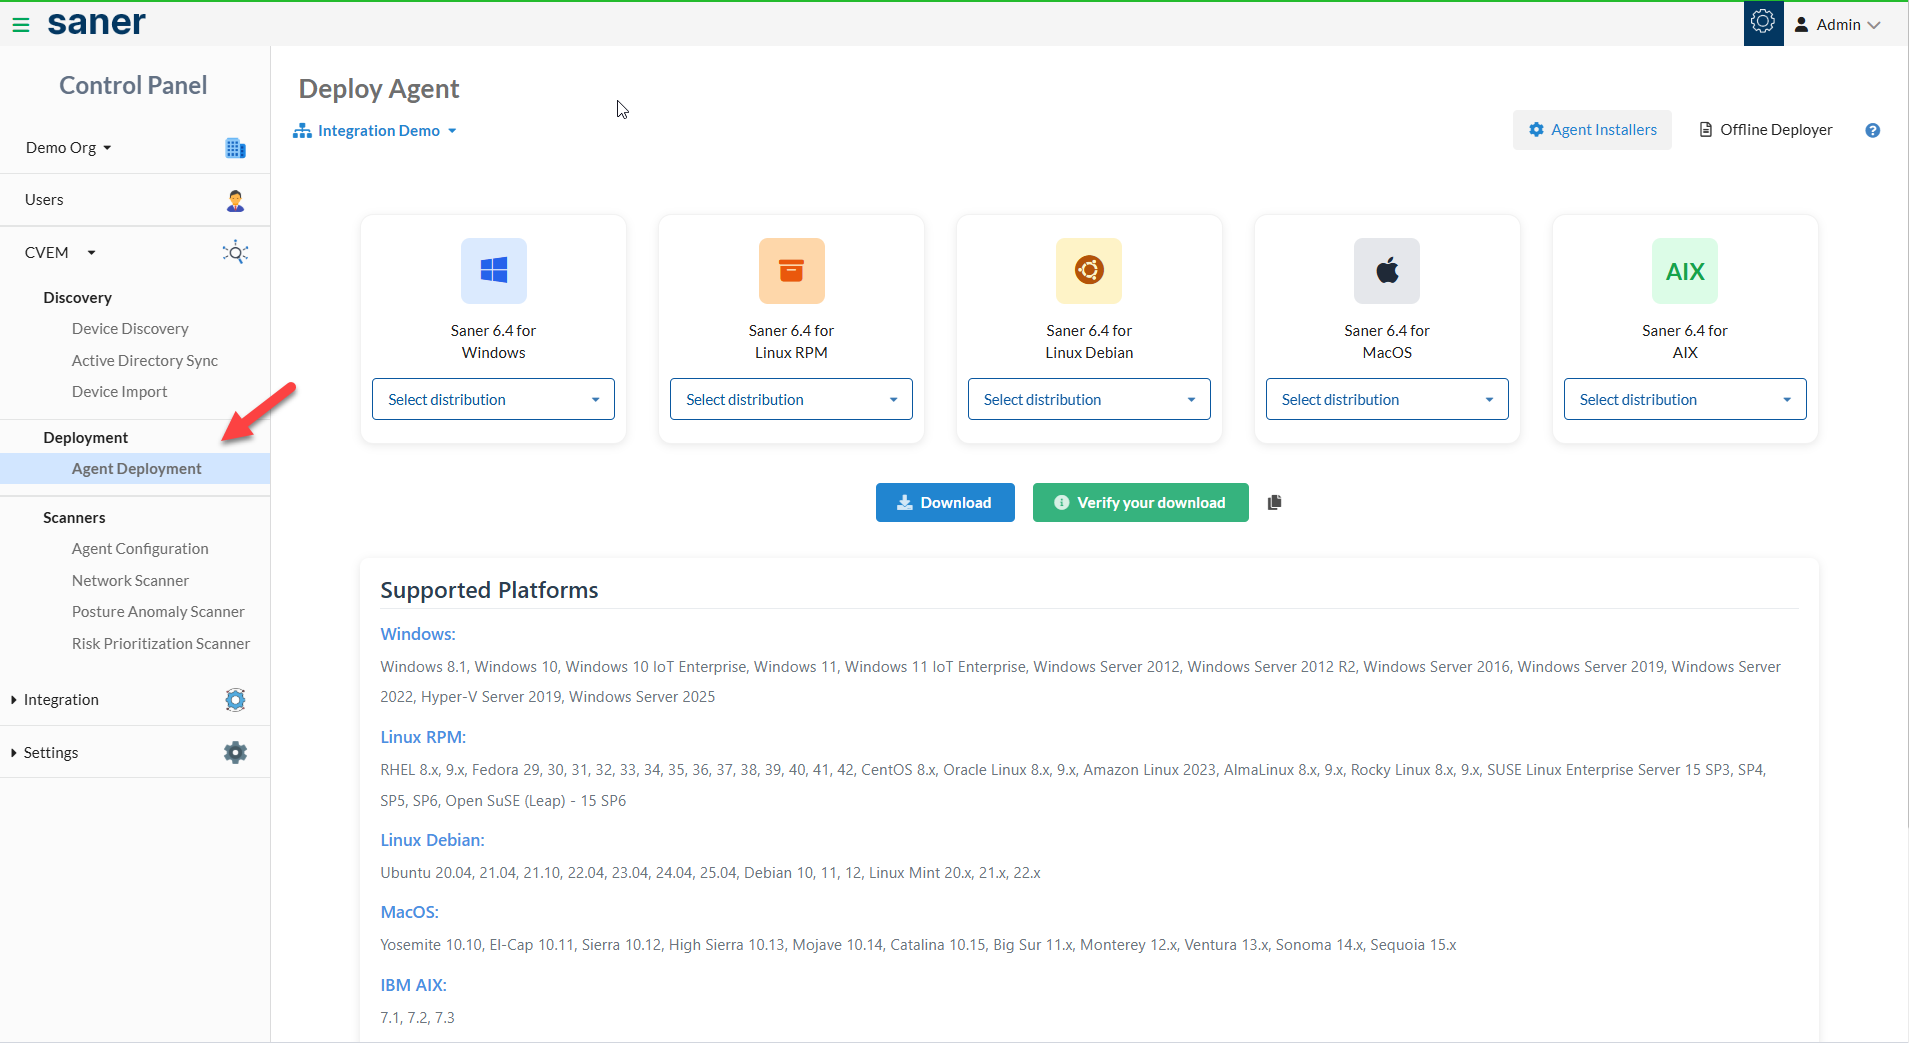
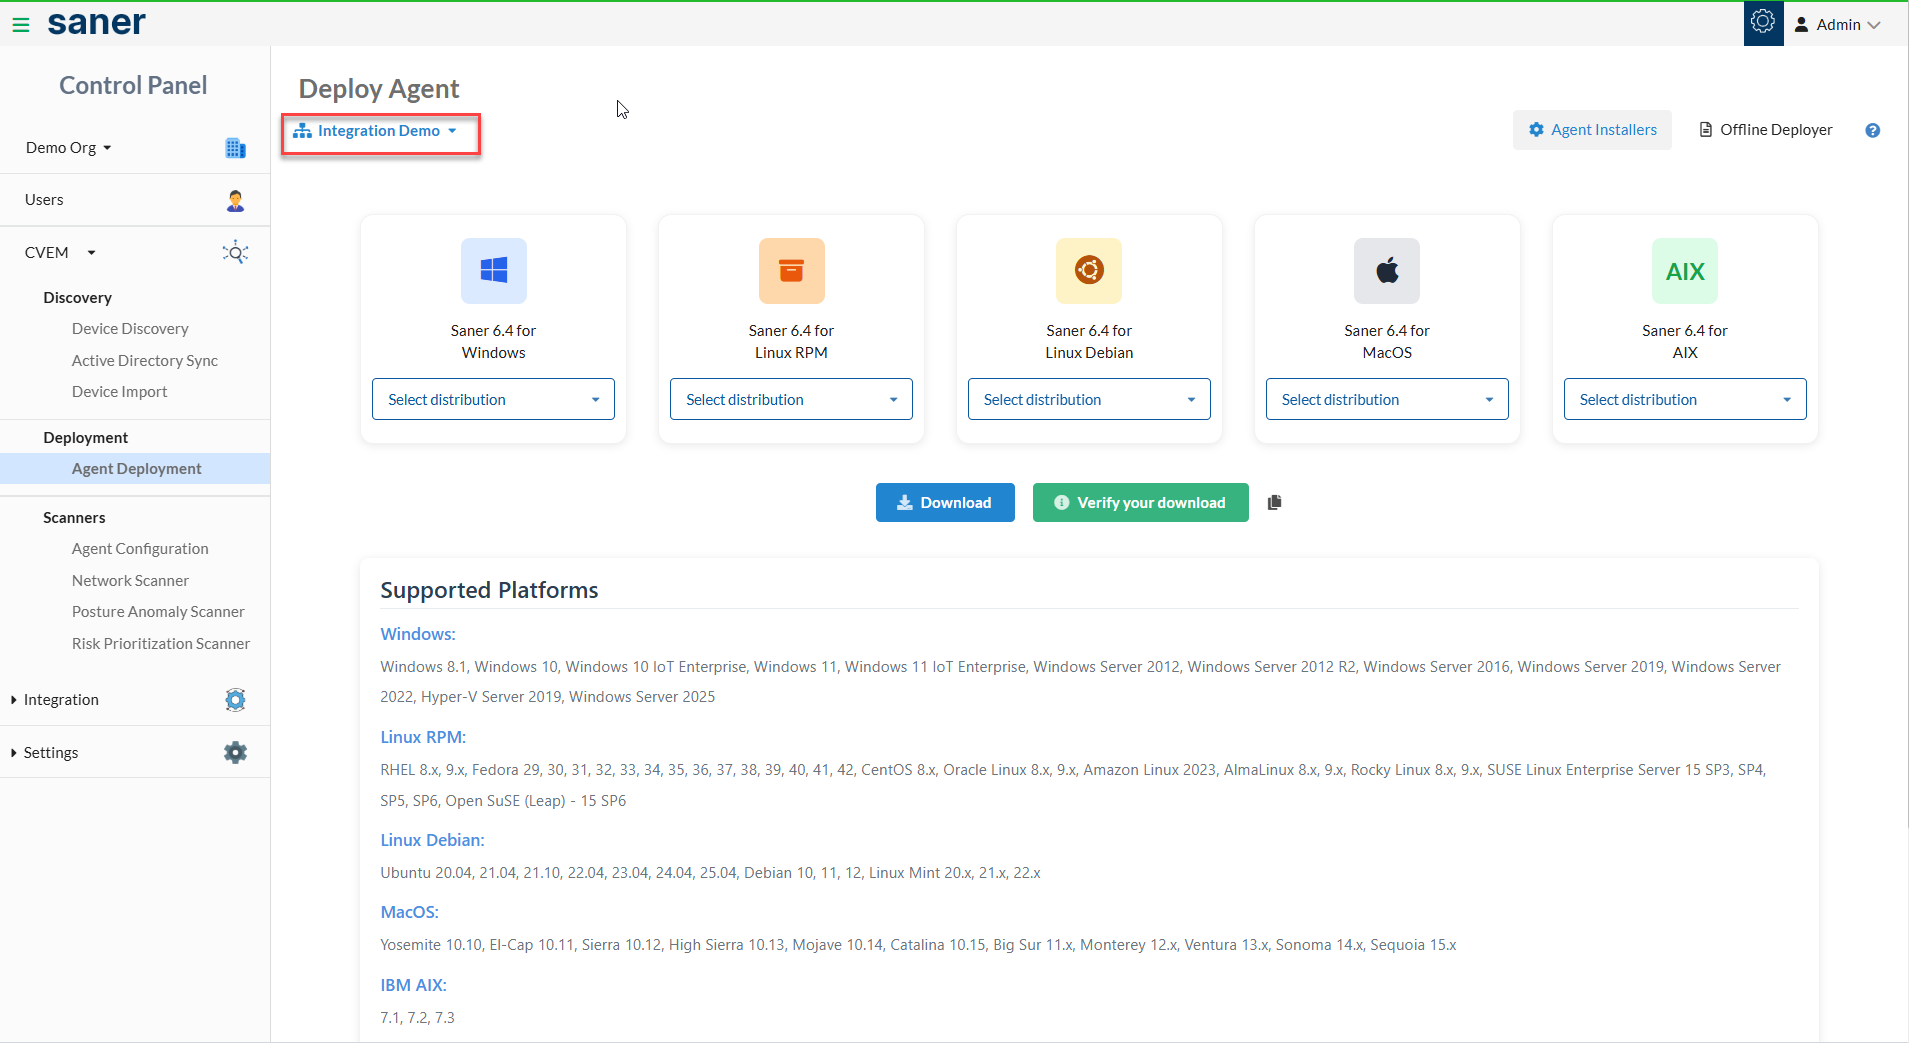
Step 3: Select the Account from the drop-down list on the left side of the page. The endpoint device will be mapped to the Account you choose here once the Saner Agent is installed and activated on the device.
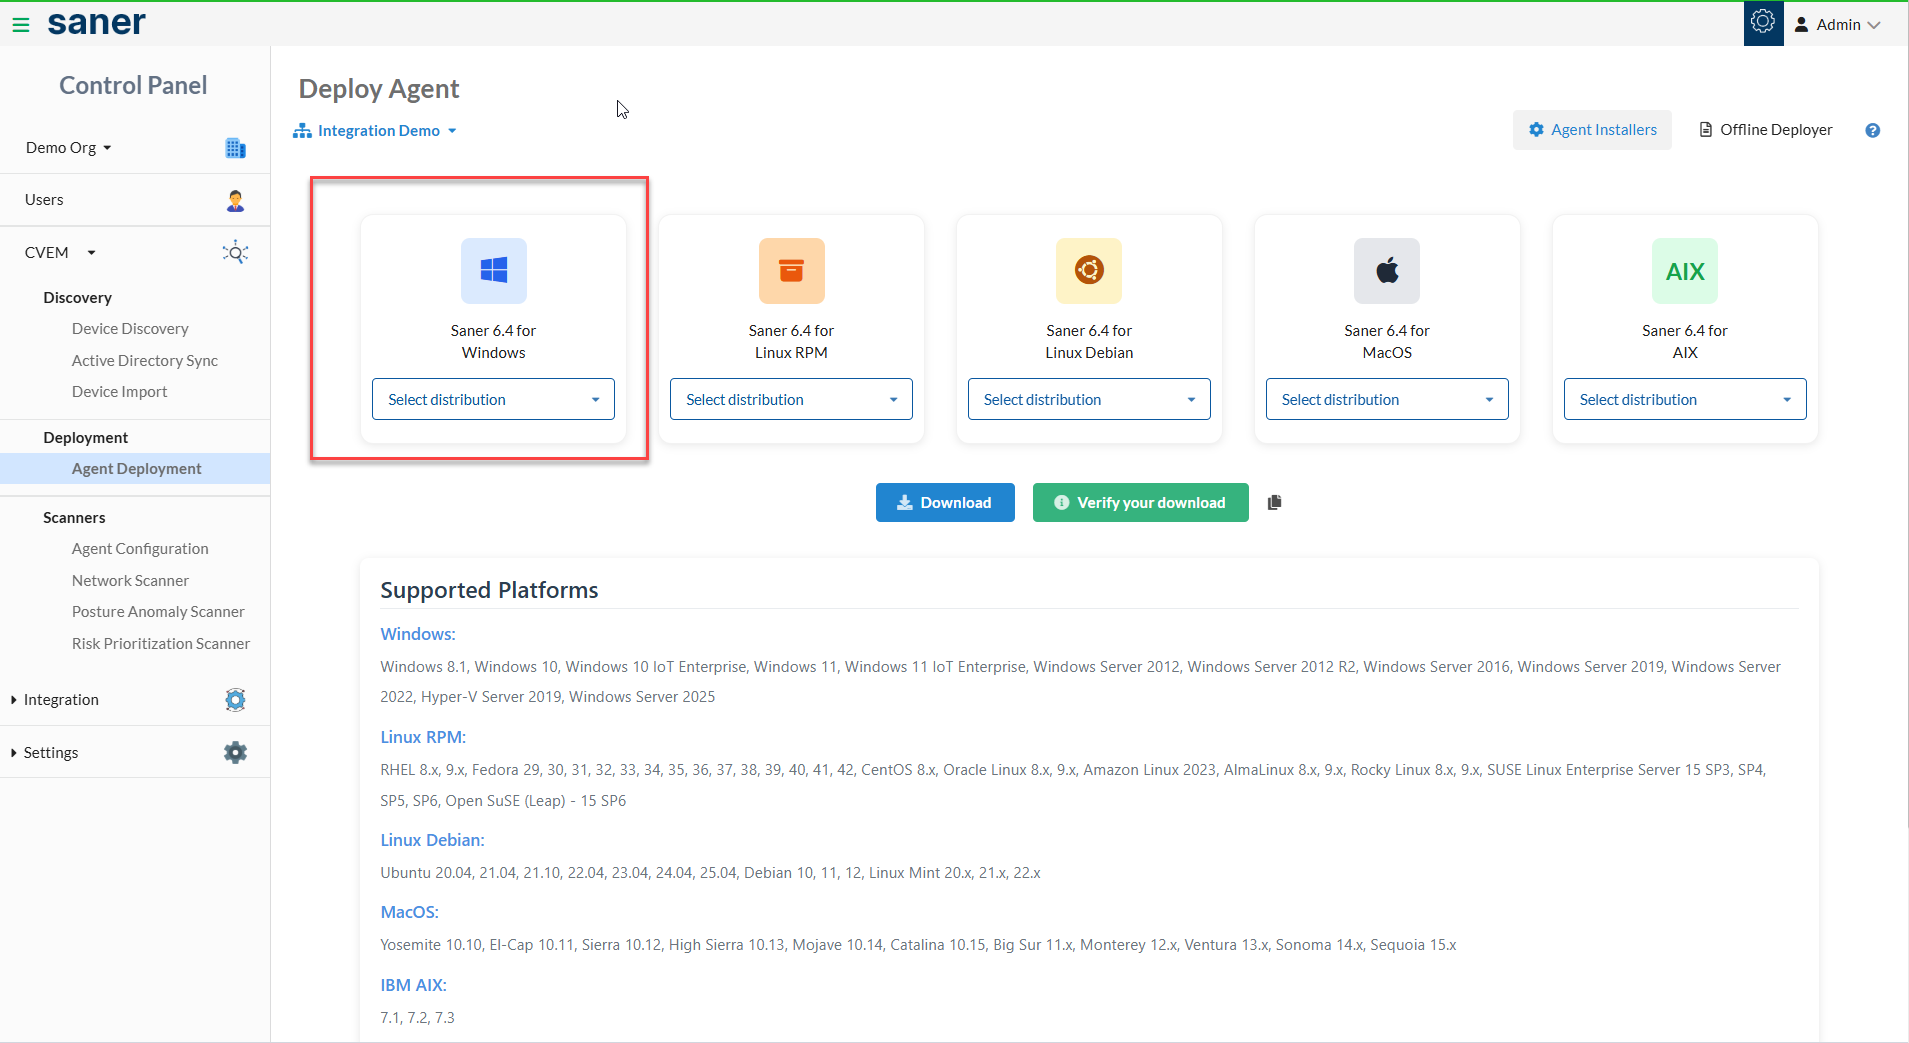
Step 4: Select the Windows option in the dropdown box below the icon Saner X.xx for Windows and click the Download button. A zip file gets downloaded onto your machine. You need to unzip the folder's contents to install the Saner Agent. (X.xx will be replaced with the latest version of Saner Agent.)
Step 5: Extract the .zip folder. You will see two files in the extracted folder: one executable file and one .conf file. Double-click on Saner_Windows_x86_X.xx.exe (X.xx will be replaced with the latest version of Saner Agent Installer).
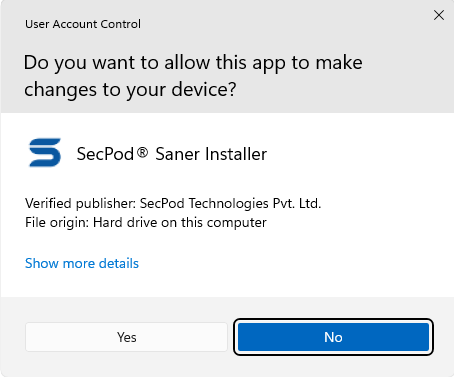
Step 6: Click the Yes button when you get the User Account Control prompt during the Saner Agent Installation.
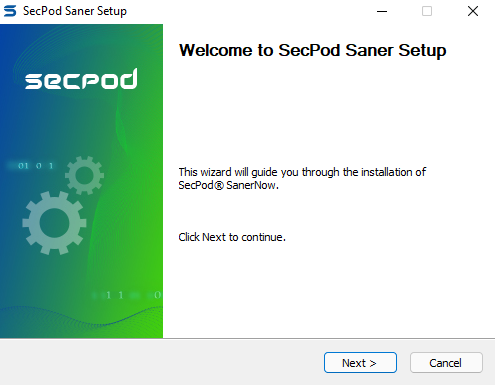
Step 7: Click the Next button on this screen.
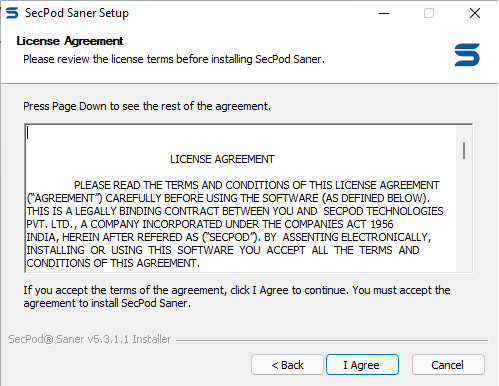
Step 8: Click the I Agree button to accept the License Agreement.
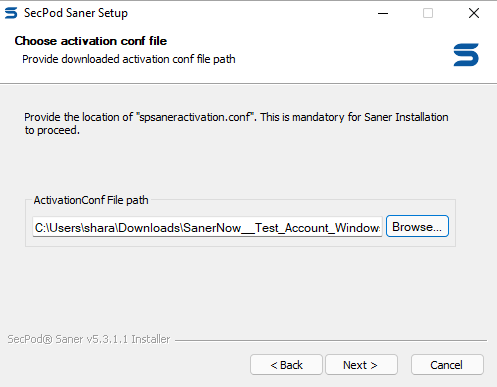
Step 9: Click the Browse button and select the 'spsaneractivation. conf ' file. (The 'spsaneractivation. conf' is present inside the extracted folder.). Then click the Next button.
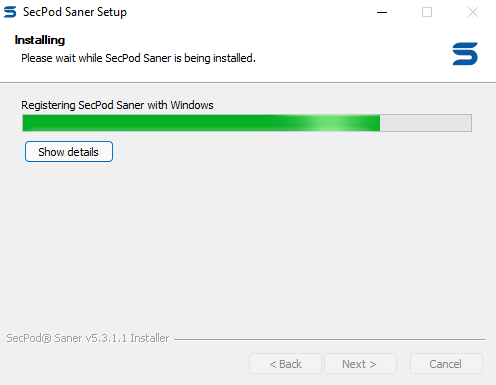
Step 10: The installer starts the installation of the Saner Agent onto the machine.
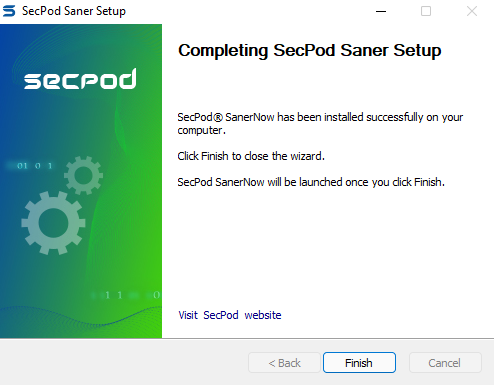
Step 11:Once the Saner Agent is successfully installed onto the machine, you will get the screen below. Click the Finish button.
C:\Program Files (x86)\SecPod Saner\install.log
The install.log file contains the record of the activities Saner Agent performed during installation.
Similarly, if the Saner Agent fails during installation, you can find the logs at the below location:
C:\App Data\Local\Temp\SecPod Saner-install.log
The SecPod Saner-install.log file contains details that the IT Administrator can use to troubleshoot the installation issue.
Installing Saner Agent on macOS Systems using Graphical Installer
Step 1: Log in to the Saner CVEM web console. Click the gear icon located on the top right to access the Control Panel.Click the Agent Deployment menu on the page's left side. On the right side of the page, you will see Saner Agent Installers for various OS platforms.
Step 2: Select the Organization you want to work with and then Click the Agent Deployment tab.
Step 3: Select the Account from the drop-down list on the left side of the page. The endpoint device will be mapped to the Account you choose here once the Saner Agent is installed and activated on the device.
Step 4: Select the macOS 64bit option in the dropdown box below the icon Saner for macOs and click the Download button. A zip file gets downloaded onto your machine.

Step 5: Open the compressed folder, and you will see two files - one .pkg file and one .conf file. Double click on Saner_MacOS_x64_X.xx.pkg (X.xx will be replaced with the latest version of Saner Agent Installer). Double-click the .pkg file to start the installation of the Saner Agent.
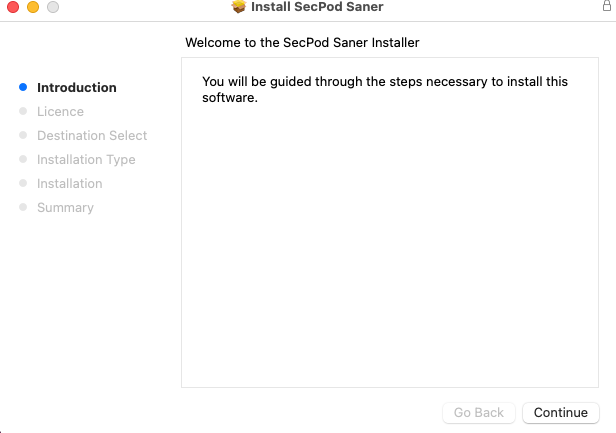
Step 6: Click the Continue button.
Step 7: Click the Continue button.
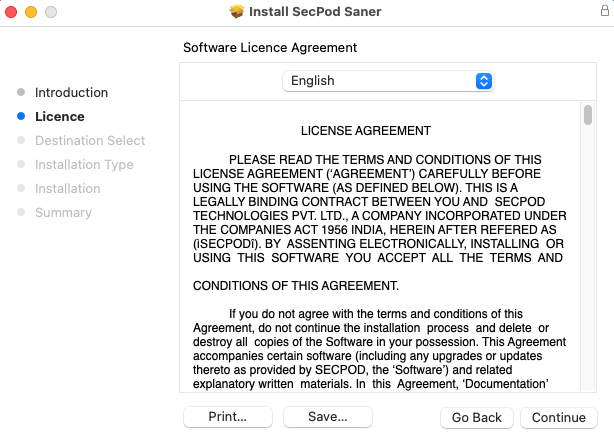
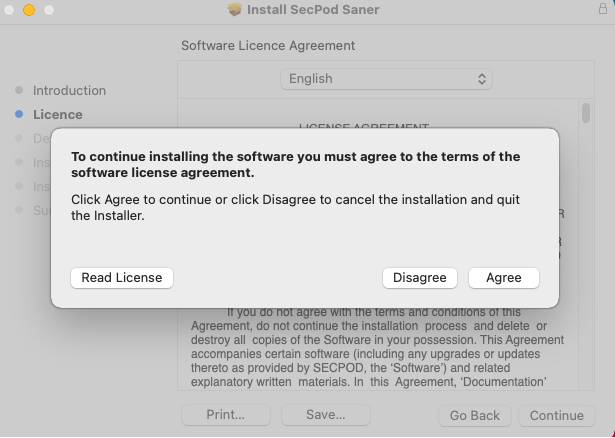
Step 8: Click the Agree button.
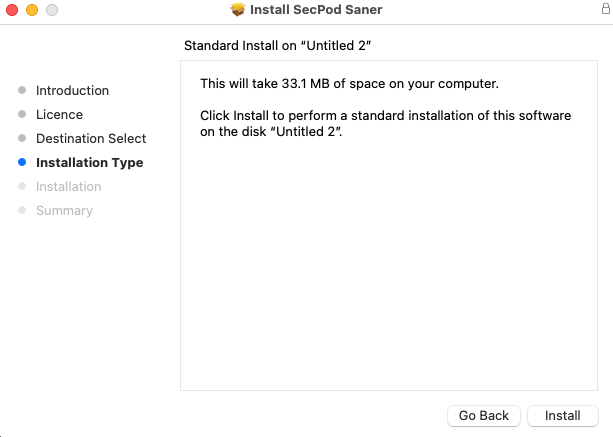
Step 9: Click the Install button.
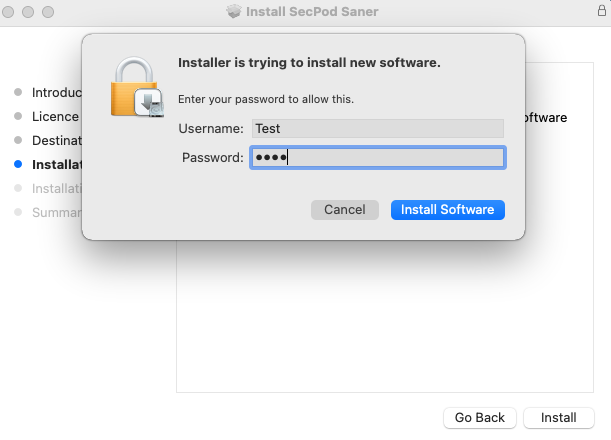
Step 10: Please provide your username and password on this screen to continue installing the Saner Agent.
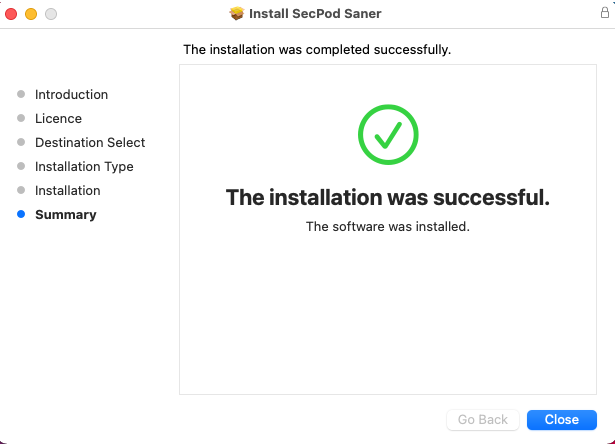
Step 11:Once the Saner Agent is successfully installed onto the machine, you will get the screen below. Click the Close button.
Click on the following links to get OS specific instructions for installing Saner Agent.
Other Topics
- What to do if Saner installer and dependent activation files are not in the same location on a Mac machine?
- How to provide proxy parameters during Saner Agent installation for activation from command line on a Linux machine?
- How to create Saner Agent packages with embedded proxy details into them from command line?
- Steps to follow for Saner Agent package creation and installation on DPKG Systems (Steps applicable for Debian, Ubuntu, and Linux Mint).
- Steps to follow for Saner Agent package creation and installation on RPM Systems (Steps applicable for RedHat, Fedora, CentOS, Oracle Linux, Amazon Linux, AMI Amazon Linux 2, Alma Linux, Rocky Linux, and SUSE Linux)
- How to install Saner Agent without activation.
- How to check Saner Agent status on your machine.
- How to disable Saner gent from launching a scan post installation?
For Windows Systems
Step 1: Extract the zip file downloaded from the Viser. You will see a folder with the name Saner_<Account Name>_Windows_x86_<version>. (Account Name will be replaced with the name of the account you used for downloading the agent from the Viser. And version will be replaced with the latest version of Saner Agent available.)
Step 2: Open an elevated command prompt (Open command prompt as an administrator) and navigate
to the location of Saner_<Account Name>_Windows_x86_<version> folder.
cd Saner_<Account Name>_Windows_x86_<version>
Step 3: Once you are in the Saner_<Account
Name>_Windows_x86_<version> folder, execute the following command.
Saner_Windows_x86_<version>.exe /S /ACTIVATION_TOKEN=<"Path of spsaneractivation.conf">
How to provide proxy parameters during Saner Agent installation for activation from command line?
If you use a proxy in your environment and would like to specify proxy parameters during Saner Agent activation, execute the following command:
Saner_Windows_x86_<version>.exe /S /ACTIVATION_TOKEN=<"Path of spsaneractivation.conf"> /AUTODETECTPROXY=false /PROXYENABLE=true /PROXYURL="ProxyServer" /PROXYPORT="ProxyPort" /PROXYAUTHENABLE=true /PROXYUNAME="ProxyUsername" /PROXYPASSWORD="ProxyUserPass"
You must provide values for the following options for the above command to run successfully.
- /ACTIVATION_TOKEN
- /AUTODETECTPROXY
- /PROXYENABLE
- /PROXYURL
- /PROXYPORT
- /PROXYAUTHENABLE
- /PROXYUNAME
- /PROXYPASSWORD
Refer to the command line options table if you need more information on the kind of values that can be provided for the above options
Command line options available for Saner Agent installation on Windows systems.
| Command line options | Description |
|---|---|
| INSTDIR =<value> | Specify the installation directory. |
| SANER_FIRST_SCAN=<TRUE|FALSE> | This option is used to enable or disable FIRST SCAN after the agent is installed.
Here, FALSE is used to disable
scan while TRUE is used to
enable scan. By default, the value is always set to TRUE. |
| SANER_ACTIVATE_OFF=<TRUE> | Specify the value as TRUE if the
agent activation is not required after installation. By default, the value is always set to FALSE |
| AUTODETECTPROXY=<true|false> | If the value is set to true then
system proxy settings are detected automatically and used. However, in that case, the
command will not accept any proxy options as input from the command line. By default, the value is always set to false. |
| PROXYENABLE=<true|false> | If the value is set to true then
you need to provide values for PROXYURL and PROXYPORT. By default, the value is always set to false. |
| PROXYURL=<value> |
Provide the URL address for your proxy server.
(You must provide the proxy
URL address if you set
PROXYENABLE=true ). |
| PROXYPORT=<value> | Provide the port number associated with your proxy server. (You must provide the proxy
port address if you set
PROXYENABLE=true ). |
| PROXYAUTHENABLE=<true|false> | If the value is set to true you
need to provide inputs for PROXYUNAME and PROXYPASSWORD parameters. This is
mandatory. By default, the value is always set to false. |
| PROXYUNAME=<value> | Provide the username for your proxy server. (You must provide the username for your
proxy server if you set
PROXYAUTHENABLE=true ). |
| PROXYPASSWORD<value> | Provide the password for your proxy server. (You must provide the password for your
proxy server if you set
PROXYAUTHENABLE=true ). |
For macOS Systems
Step 1: Download the zip file from the Viser. You will see a folder with the name Saner_<Account Name>_MacOS-x64_<version>. (Account Name will be replaced with the name of the account you used for downloading the agent from the Viser. And version will be replaced with the latest version of Saner Agent available.)
Step 2: Open the terminal application and execute the following command to extract the
contents of the zip folde
unzip Saner_<Account Name>_MacOS_x64_<version>.zip
Step 3: Navigate to the Saner_MacOS_x64_<version> directory by executing the following command.
cd Saner_<Account Name>_MacOS_x64_<version>
Step 4: Once you are in the directory, execute the following command to install Saner Agent.
sudo installer -pkg Saner_MacOS_x64_<version>.pkg -target /
What to do if Saner installer and dependent activation files are not in the same location?
In such situations where Saner_MacOS_x64_<version>.pkg and the spsaneractivation.conf files are not in the same location, execute the following command.
/bin/launchctl setenv ACTIVATION_TOKEN <"Provide absolute path of spsaneractivation.conf file">
Once the above command executes successfully, you can go ahead and execute the commands specified in Step 4 to get Saner Agent installed on your macOS system.
For Linux Systems (Applicable only for Binary Installation)
Step 1: Download the agent installer zip file from the Viser.. Once the file is downloaded, run the following command to unzip the contents of the zip file. ( Account Name will be replaced with the name of the account you used for downloading the agent from the Viser. And version will be replaced with the latest version of Saner Agent available. Also, <linux_flavour> and <arch> will be replaced with the Linux flavour and OS architecture you are using.)
unzip Saner_<Account Name>_<linux_flavour>_<arch>_<version>.zip
Step 2: Navigate to the directory that has been unzipped. ( cd Saner_<Account Name>_<linux
flavour>_<arch>_<version>
Step 3: Now once you are in the Saner_<Account
Name>_<linux flavour>_<arch>_<version> directory, make the Saner_<linux flavour>_<arch>_<version> bin file
executable by using the following command. However, ensure that the account used for agent
installation has sudo privileges.
sudo chmod +x Saner_<linux flavour>_<arch>_<version>.bin
Step 4: Once the file is made executable, run the following command to install Saner Agent
on a Linux machine.
sudo ./Saner_<linux flavour>_<arch>_<version>.bin --config spsaneractivation.conf
For instance, the command will look like this on a machine running Fedora Linux
sudo ./Saner_Fedora_x64_<version>.bin --config spsaneractivation.conf
How to provide proxy parameters during Saner Agent installation for activation from command line?
If you use a proxy in your environment and would like to specify proxy parameters during Saner Agent installation, execute the following command:
Saner_<linux flavour>_<arch>_<version>.bin --config spsaneractivation.conf --proxyurl <value> --proxyport <value> --proxypass <value>
How to create Saner Agent packages with embedded proxy details from command line?
Saner_<linux flavour>_<arch>_<version>.bin --config spsaneractivation.conf --pkgfilepath <value> --proxyurl <value> --proxyport <value> --proxypass <value>
Refer the options table if you need more information on the kind of values that can be provided during Saner Agent installation with proxy.
Options that can be used for Saner Agent installation with proxy.
| Options | Value |
|---|---|
| proxyurl | Provide the URL for your proxy server |
| proxyport | Provide the port number associated with your proxy server |
| proxyuser | Provide the username for your proxy server |
| proxypass | Provide the password for your proxy server |
Follow these steps for Saner Agent package creation and installation on DPKG Systems (Applicable for Debian, Ubuntu, and Linux Mint OSs)
Pre-requisite steps to be followed before package creation:
For creating a deb package on a Linux machine, you need to have dpkg-deb package on your system. This is a pre-requisite for package creation. Execute the following command to check if dpkg-deb package is installed on your system.
sudo dpkg-query -l | grep deb
If you are unable to find dpkg-deb package on your machine, execute the following command to install dpkg-deb package. You can skip this step if dpkg-deb package already exists on your system and proceed directly to Step 1
sudo apt install dpkg
Step 1: Download the zip file from the Viser. and execute the following command to unzip its contents.
unzip Saner_<Account Name>_<linux_flavour>_<arch>_<version>.zip
Step 2: Navigate to the directory that has been unzipped.
cd Saner_<Account Name>_<linux flavour>_<arch>_<version>
Step 3: Now once you are in the Saner_<Account
Name>_<linux flavour>_<arch>_<version> directory, make the Saner_<linux flavour>_<arch>_<version> bin file
executable by using the following command. However, ensure that the account used for agent
installation has sudo privileges.
sudo chmod +x Saner_<linux flavour>_<arch>_<version>.bin
Step 4: Once you have set the permissions to the binary file, execute the following command to
create Saner Agent package.
sudo ./Saner_<linux flavour>_<arch>_<version>.bin --config spsaneractivation.conf --pkgfilepath <Provide the absolute path where you want the installer package to be created>
Step 5:Now navigate to the path where the installer package has been created.
cd <path where the package installer has been created>
Step 6:Once you are in the directory where the package installer has been created. Execute the following command to install the package.
sudo dpkg -i SpSaner-minimal-<arch>.deb
Follow these steps for Saner Agent package creation and installation on RPM Systems (Applicable for RedHat, Fedora, CentOS, Oracle Linux, Amazon Linux, AMI Amazon Linux 2, Alma Linux, Rocky Linux, and SUSE Linux OSs)
Pre-requisite steps to be followed before package creation:
For creating a rpm package on a Linux machine, you must have rpm package installed on your system. This is a pre-requisite for package creation. Execute the following command to check if rpm package is installed on your system.
sudo rpm -qa |grep rpm
If rpm package is found installed on your system, proceed directly to Step 1 for Saner Agent installation. Else, proceed with the following steps to install rpm package on your machine.
For DPKG-based systems: If you are using a DPKG system and want to create a package, execute the following command to install rpm-build package. This is a pre-requisite for package creation.
sudo apt install rpm
For RPM based systems: If you are using an RPM system and want to create a package, execute the following command to install rpm-build package. This is a pre-requisite for package creation.
sudo yum install rpm-build
Step 1: Download the zip file from the Viser. and execute the following command to unzip its contents.
unzip Saner_<Account Name>_<linux_flavour>_<arch>_<version>.zip
Step 2: Navigate to the directory that has been unzipped.
cd Saner_<Account Name>_<linux flavour>_<arch>_<version>
Step 3: Now once you are in the Saner_<Account
Name>_<linux flavour>_<arch>_<version> directory, make the Saner_<linux flavour>_<arch>_<version> bin file
executable by using the following command. However, ensure that the account used for agent
installation has sudo privileges.
sudo chmod +x Saner_<linux flavour>_<arch>_<version>.bin
Step 4: Once you have set the permissions to the binary file, execute the following command to
create Saner Agent package.
sudo ./Saner_<linux flavour>_<arch>_<version>.bin --config spsaneractivation.conf --pkgfilepath <Provide the absolute path where you want the installer package to be created>
Step 5:Now navigate to the path where the installer package has been created.
cd <path where the package installer has been created>
Step 6:Once you are in the directory where the package installer has been created. Execute the following command to install the package.
sudo rpm -ivh SpSaner-minimal-<arch>.rpm
For Alpine Systems
Step 1: Download the agent installer zip file from the Viser. Once the file is downloaded, execute the following command to unzip the contents of the zip file.
unzip Saner_<Account Name>_<linux_flavour>_<arch>_<version>.zip
Step 2: Navigate to the directory that has been unzipped.
cd Saner_<Account Name>_<linux flavour>_<arch>_<version>
Step 3: Now once you are in the Saner_<Account
Name>_<linux flavour>_<arch>_<version> directory, make the Saner_<linux flavour>_<arch>_<version> bin file
executable by using the following command. However, ensure that the account used for agent
installation has sudo privileges.
sudo chmod +x Saner_<linux flavour>_<arch>_<version>.bin
Step 4: Once the file is made executable, execute the following command to create Saner
Agent package.
sudo ./Saner_<linux flavour>_<arch>_<version>.bin --config spsaneractivation.conf --pkgfilepath <provide the absolute path where you want the package to be created>
Step 5:Now navigate to the path where the installer package has been created.
cd <path where the package installer has been created>
Step 6: Once you are in the folder where the package installer has been created. Execute the following command to install the package.
sudo apk add SpSaner-minimal-<arch>.apk --allow-untrusted
For AIX Systems
Step 1: Download the agent installer zip file from the Viser. Execute the following command to unzip the zip file's contents once the file gets downloaded. < ( Account Name > will be replaced with the Account name you used for downloading the Saner AIX Agent from the Viser. And < version > will be replaced with the latest version of the Saner AIX Agent.)
unzip Saner_<Account Name>_AIX_x64_<version>.zip
Step 2: Navigate to the unzipped folder.
cd Saner_<Account Name>_AIX_x64_<version>
Step 3: Once you are in the Saner_<Account Name>_AIX_x64_<version> folder, make the Saner_Account Name_AIX_x64_<version> bin file executable by running the following command. However, ensure that the account used here has sudo privileges.
sudo chmod +x Saner_AIX_x64_<version>bin
Step 4: Once the file is executable, execute the following command to create the Saner Agent package.
sudo ./Saner_AIX_x64_<version>.bin --config spsaneractivation.conf
Follow the instructions mentioned below to uninstall Saner Agent from Windows systems
For Windows 64-bit version
Step 1: Open an elevated command prompt(Open command prompt as an administrator.) Navigate to the following location. Replace <version> with the Saner version you are using.
cd C:\Program Files (x86)\SecPod Saner\Agent\<version>\bin
For instance, if you are using the Saner 6.3.1.1 version, then the location would look like this
cd C:\Program Files (x86)\SecPod Saner\Agent\6.3.1.1\bin
Step 2: Once you are in the bin folder, execute the following command.
C:\Program Files (x86) \SecPod Saner\Agent\<version>\bin\spsaneruninstall.exe /S
Execute the following command to uninstall a password protected agent. Replace 'UninstallAccountPass' with the password you used during agent installation.
C:\Program Files (x86) \SecPod Saner\Agent\<version>\bin\spsaneruninstall.exe /S /SANER_UNINSTALL_PASS="UninstallAccountPass"
For Windows 32-bit version
Step 1: Open an elevated command prompt(Open command prompt as an administrator.) Navigate to the following location. Replace <version> with the Saner CVEM version you are using.
cd C:\Program Files (x86)\SecPod Saner\Agent\<version>\bin
For instance, if you are using the Saner CVEM 6.3.1.1 version, then the location would look like this
cd C:\Program Files (x86)\SecPod Saner\Agent\6.3.1.1\bin
Step 2: Once you are in the bin folder, execute the following command.
C:\Program Files \SecPod Saner\Agent\<version>\bin\spsaneruninstall.exe /S
Execute the following command to uninstall a password protected agent.
C:\Program Files \SecPod Saner\Agent\<version>\bin\spsaneruninstall.exe /S /SANER_UNINSTALL_PASS="UninstallAccountPass"
For macOS
Follow the below instructions to uninstall Saner Agent from Mac systems.
Step 1: Open Terminal application on your mac and run the following command. However, make sure the account used for uninstallation has sudo privileges.
sudo spsaner.uninstall
Step 2: If the agent is password protected, execute the following command. Replace 'UninstallAccountPass' with the password you used during agent installation
sudo export SANER_UNINSTALL_PASS="UninstallAccountPass";spsaner.uninstall
For Linux
Follow these instructions to uninstall Saner Agent from Linux systems.
Open Terminal application on your Linux machine and execute the following command. However, make sure the account used for uninstallation has sudo privileges.
sudo spsaner.uninstall
If the agent is password protected, execute the following command. Replace 'UninstallAccountPass' with the password you used during Saner Agent installation
sudo export SANER_UNINSTALL_PASS="UninstallAccountPass";spsaner.uninstall;
For AIX Systems
Follow these instructions to uninstall Saner Agent from an AIX system.
Open the Terminal application on your AIX machine and execute the following command. However, make sure the account used for uninstallation has sudo privileges.
sudo spsaner.uninstall
If the agent is password protected, execute the following command. Replace 'UninstallAccountPass' with the password you used during Saner Agent installation
sudo export SANER_UNINSTALL_PASS="UninstallAccountPass";spsaner.uninstall;
By default, Saner Agent automatically gets activated after installation. However, when creating OS images with Saner Agent preinstalled, you don't want the agent to be automatically activated.
Saner Agent allows you to control its automatic activation behavior. Follow the steps mentioned below to install Saner Agent without activating it automatically.
On Windows Systems
Step 1: Extract the zip file downloaded from the Viser. You will see a folder with the name Saner_<Account Name>_Windows_x86_<version>. (Account Name will be replaced with the name of the account you used for downloading the agent from the Viser. And version will be replaced with the latest version of Saner Agent available.)
Step 2: Open an elevated command prompt (Open command prompt as an administrator) and navigate to the location of Saner_<Account Name>_Windows_x86_<version> folder.
cd Saner_<Account Name>_Windows_x86_<version>
Step 3: Once you are in the Saner_<Account Name>_Windows_x86_<version> folder, execute the following command.
Saner_Windows_x86_<version>.exe /S /ACTIVATION_TOKEN=<"Path of spsaneractivation.conf"> /SANER_ACTIVATE_OFF=TRUE
On macOS Systems
Step 1: Run the below mentioned command to create a file 'SanerActivationDisable' in 'tmp' folder.
touch /tmp/SanerActivationDisable
Step 2: Follow Saner Agent installation steps mentioned under the section For macOS Systems.
On Linux Systems
Step 1: Run the below mentioned command to create a file 'SanerActivationDisable' in 'tmp' folder.
touch /tmp/SanerActivationDisable
Step 2: Follow Saner Agent installation steps mentioned under the section For Linux Systems.
On AIX Systems
Step 1: Run the below mentioned command to create a file 'SanerActivationDisable' in 'tmp' folder.
touch /tmp/SanerActivationDisable
Step 2: Follow Saner Agent installation steps mentioned under the section For AIX Systems section.
On Windows Systems
Step 1: Open an elevated command prompt (Open command prompt as an administrator) and run the below command.
sc query "SecPod Saner Agent"
Once the command executes successfully, it will display the present state of Saner Agent on the machine.
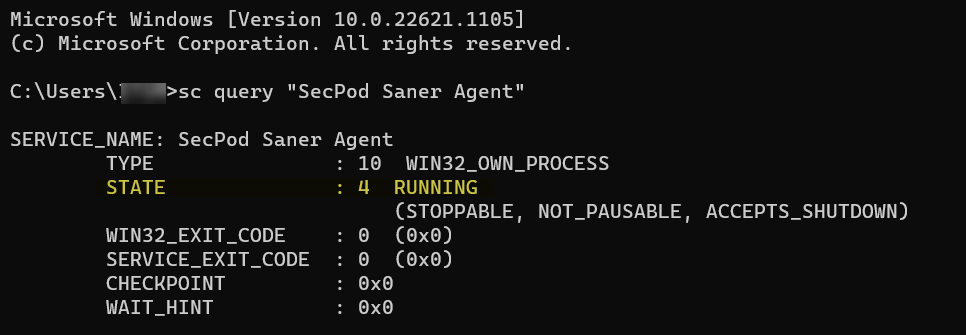
Step 2: The STATE will be displayed as 'RUNNING' if Saner Agent is active and running on the endpoint. If the 'STATE' is not displayed as 'RUNNING' when you execute the command mentioned in Step 1, run the below mentioned command to start Saner Agent service.
net start "SecPod Saner Agent"
On macOS Systems
Step 1: Launch Terminal application and run the below mentioned command. However, ensure that the account used to execute the command has sudo privileges.
sudo launchctl list | grep com.secpod.pkg.saner
Once the command executes successfully, it will display the pid associated with Saner Agent.

Step 2: If no 'pid' and 'com.secpod.pkg.saner' is displayed when you execute the command mentioned in Step 1, run the below mentioned command to start Saner Agent daemon.
/bin/launchctl load /Library/LaunchDaemons/com.secpod.pkg.saner.plist
On Linux Systems
Step 1: Launch Terminal application and run the below mentioned command. However, ensure that the account used to execute the command has sudo privileges.
systemctl status spsaner
Some older versions of Linux might not support the above command. On such systems, you can use the command mentioned below.
service spsaner status
Once the command executes successfully, it will display Saner Agent Active status.
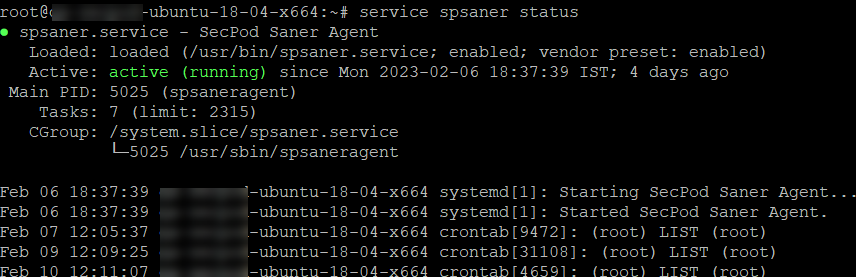
Step 2: The Active option will be displayed as 'RUNNING' if Saner Agent is active and running on the endpoint. If the Active option is not displayed as 'active (running)' when you execute the command mentioned in Step 1, run the below mentioned command to start Saner Agent service.
systemctl start spsaner
Alternatively, you can run the command below if your Linux system doesn't support the above-mentioned command.
service spsaner start
On AIX Systems
Step 1: Launch Terminal application and run the below mentioned command. However, ensure that the account used to execute the command has sudo privileges.
lssrc -a | grep spsaner
Once the command executes successfully, the Saner Agent Status is displayed.

By default, Saner Agent initiates a device scan post-installation. However, if you want to install Saner Agent and don't want the scan to occur, follow the steps below.
Follow the below steps to disable the first scan post Saner Agent installation.
On Windows Systems
Step 1: Follow the instructions mentioned in Step 1 and Step 2 on how to install Saner Agent on Windows Systems
Step 2: Execute the following command once in the Saner_<Account Name>_Windows_x86_xxx folder. The below command installs the Saner Agent and disables the first scan post-installation.
Saner_Windows_x86_xxx.exe /S /ACTIVATION_TOKEN =<"Path of spsaneractivation.conf"> /SANER_FIRST_SCAN=FALSE
On macOS Systems
Step 1: Run the below-mentioned command to create a file 'SanerFirstScanDisable' in the 'tmp' folder.
touch /tmp/SanerFirstScanDisable
Step 2: Follow the Saner Agent installation steps mentioned under the For macOS Systems section.
On Linux Systems
Step 1: Run the below-mentioned command to create a file 'SanerFirstScanDisable' in the 'tmp' folder.
touch /tmp/SanerFirstScanDisable
Step 2: Follow the Saner Agent installation steps mentioned under the For Linux Systems section.
On AIX Systems
Step 1: Run the below-mentioned command to create a file 'SanerFirstScanDisable' in the 'tmp' folder.
touch /tmp/SanerActivationDisable
Step 2: Follow the Saner Agent installation steps mentioned under the For AIX System section.